Tools
Emails sent
Users can have a look at the list of the automatic emails sent.
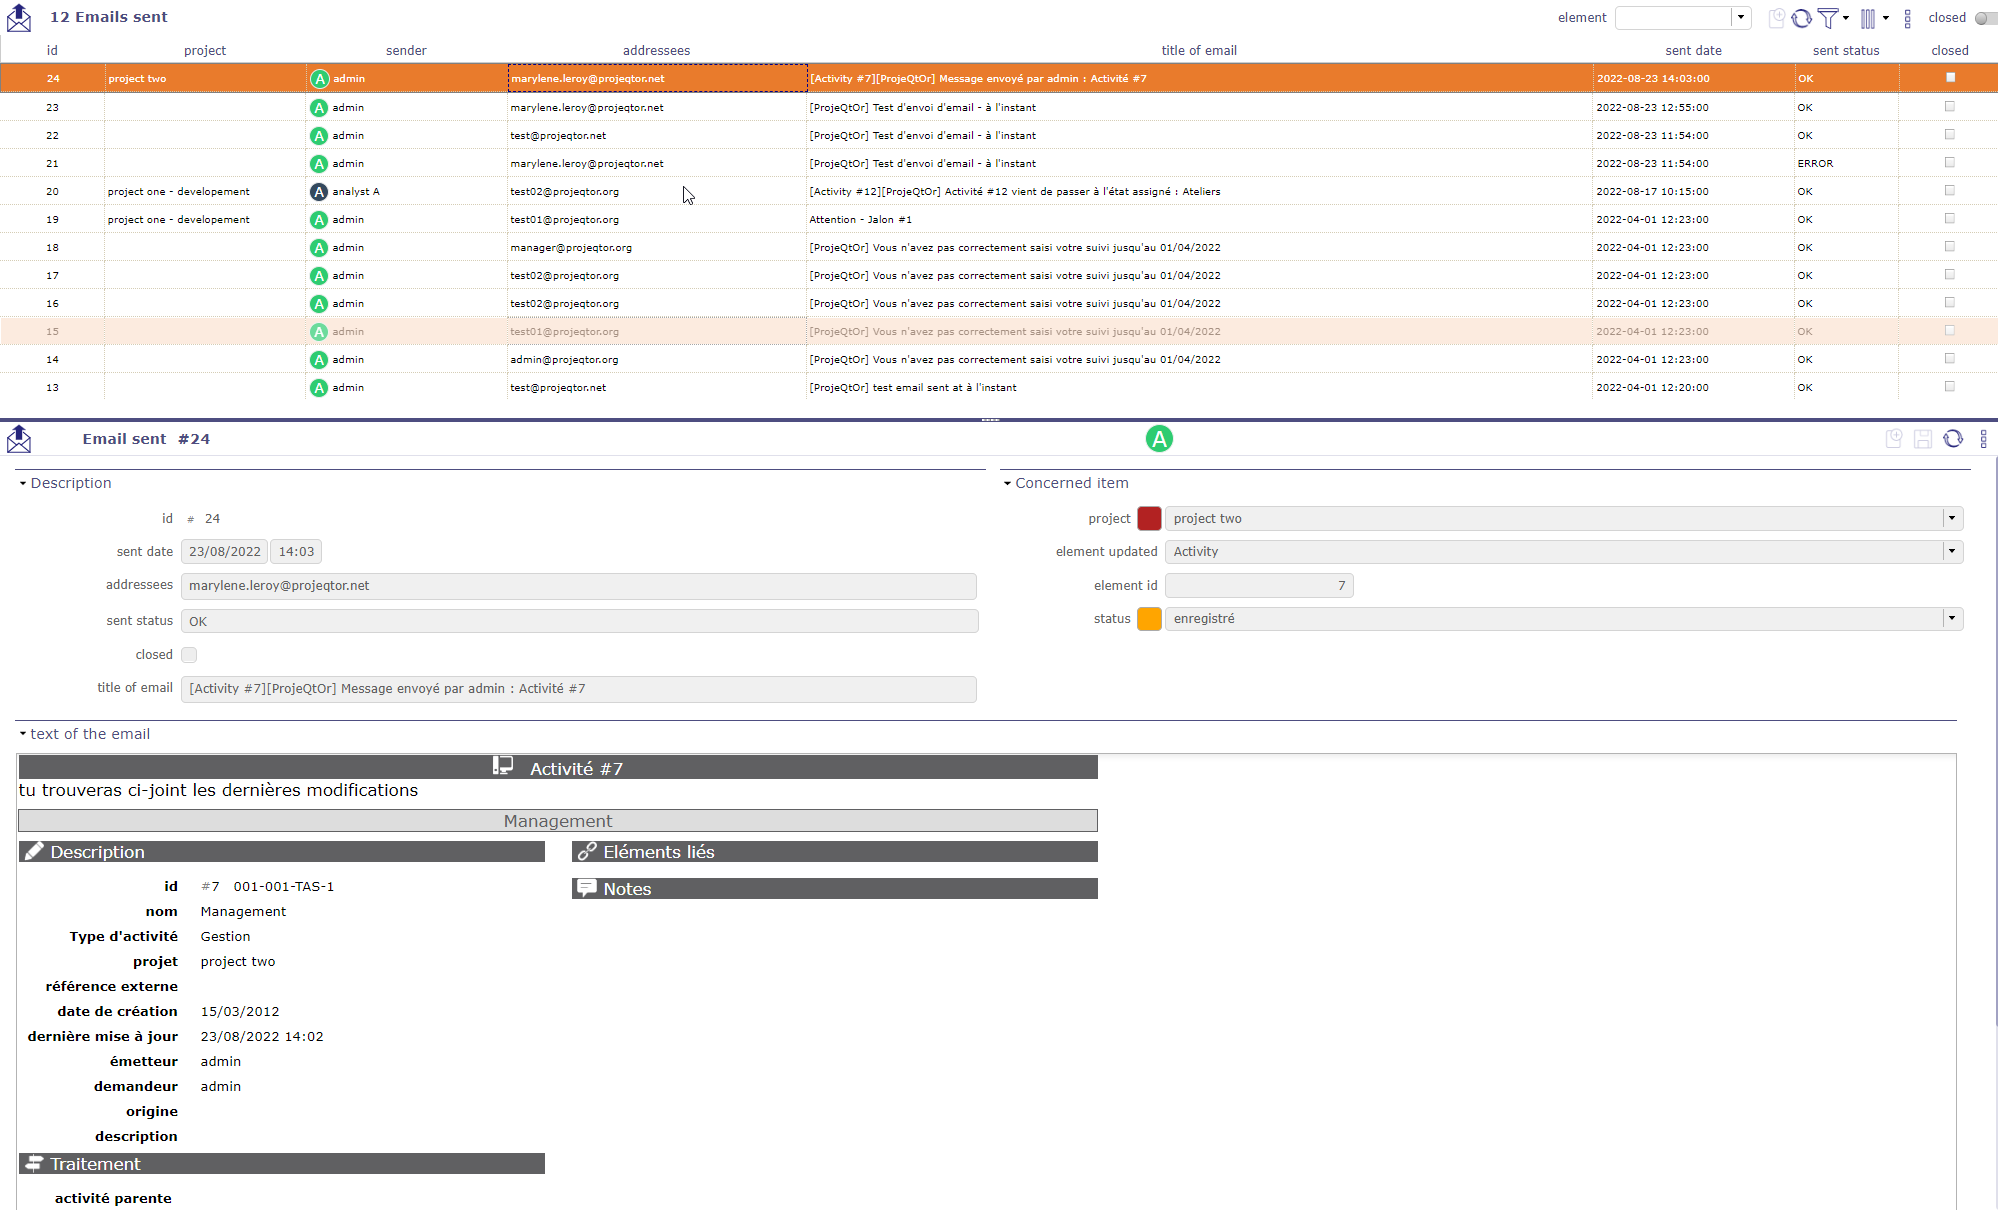
emails sent screen
All the information about the email, including the status showing whether the email was correctly sent or not.
You can see in the activity feed of the item the trace of the sending of the corresponding email with the subject and the text of the message.
Emails to send
You must enable the Activate email grouping option in the global parameters
The programmed emails will be grouped in this screen before their automatic sending based on the period entered in the global parameters
Scheduled report
In reports, you can schedule sending emails for accurate reports.
You can get the list and details of this programming on this screen
Click on Button  to cancelled the programmation

Scheduled report screen
See also
Alerts
Users can have a look at the alerts sent.
By default, administrators can see all the alerts sent, and other users only see their own alerts.
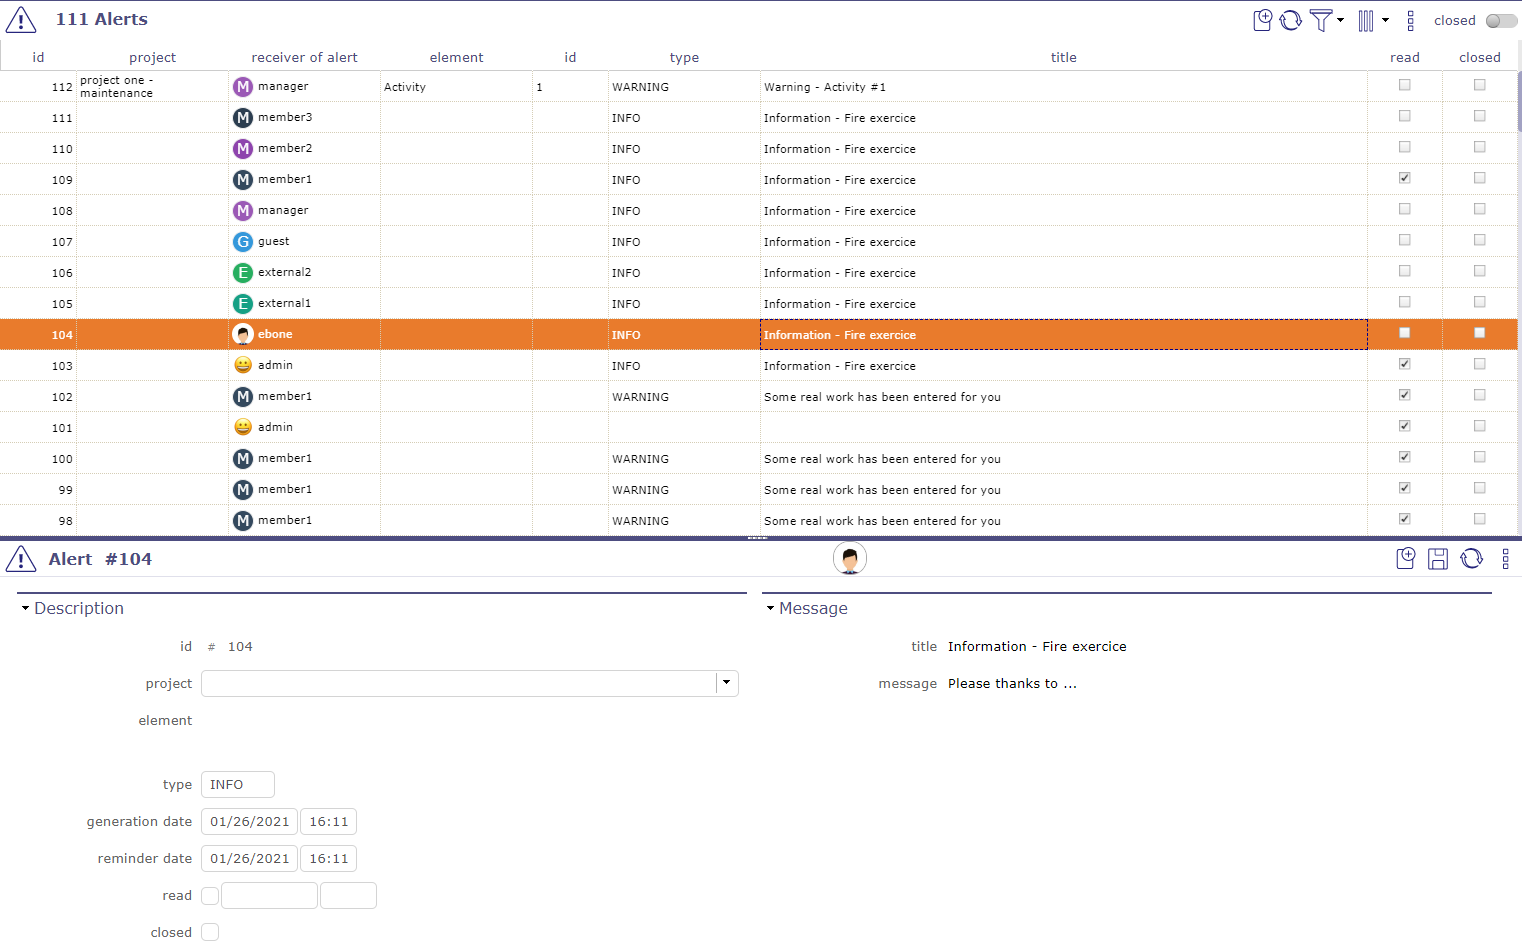
Alert screen
The button Mark as read is available ifxthe user alert is not tagged “read” yet.
Messages
You can define some message that will be displayed on the login and today screen.
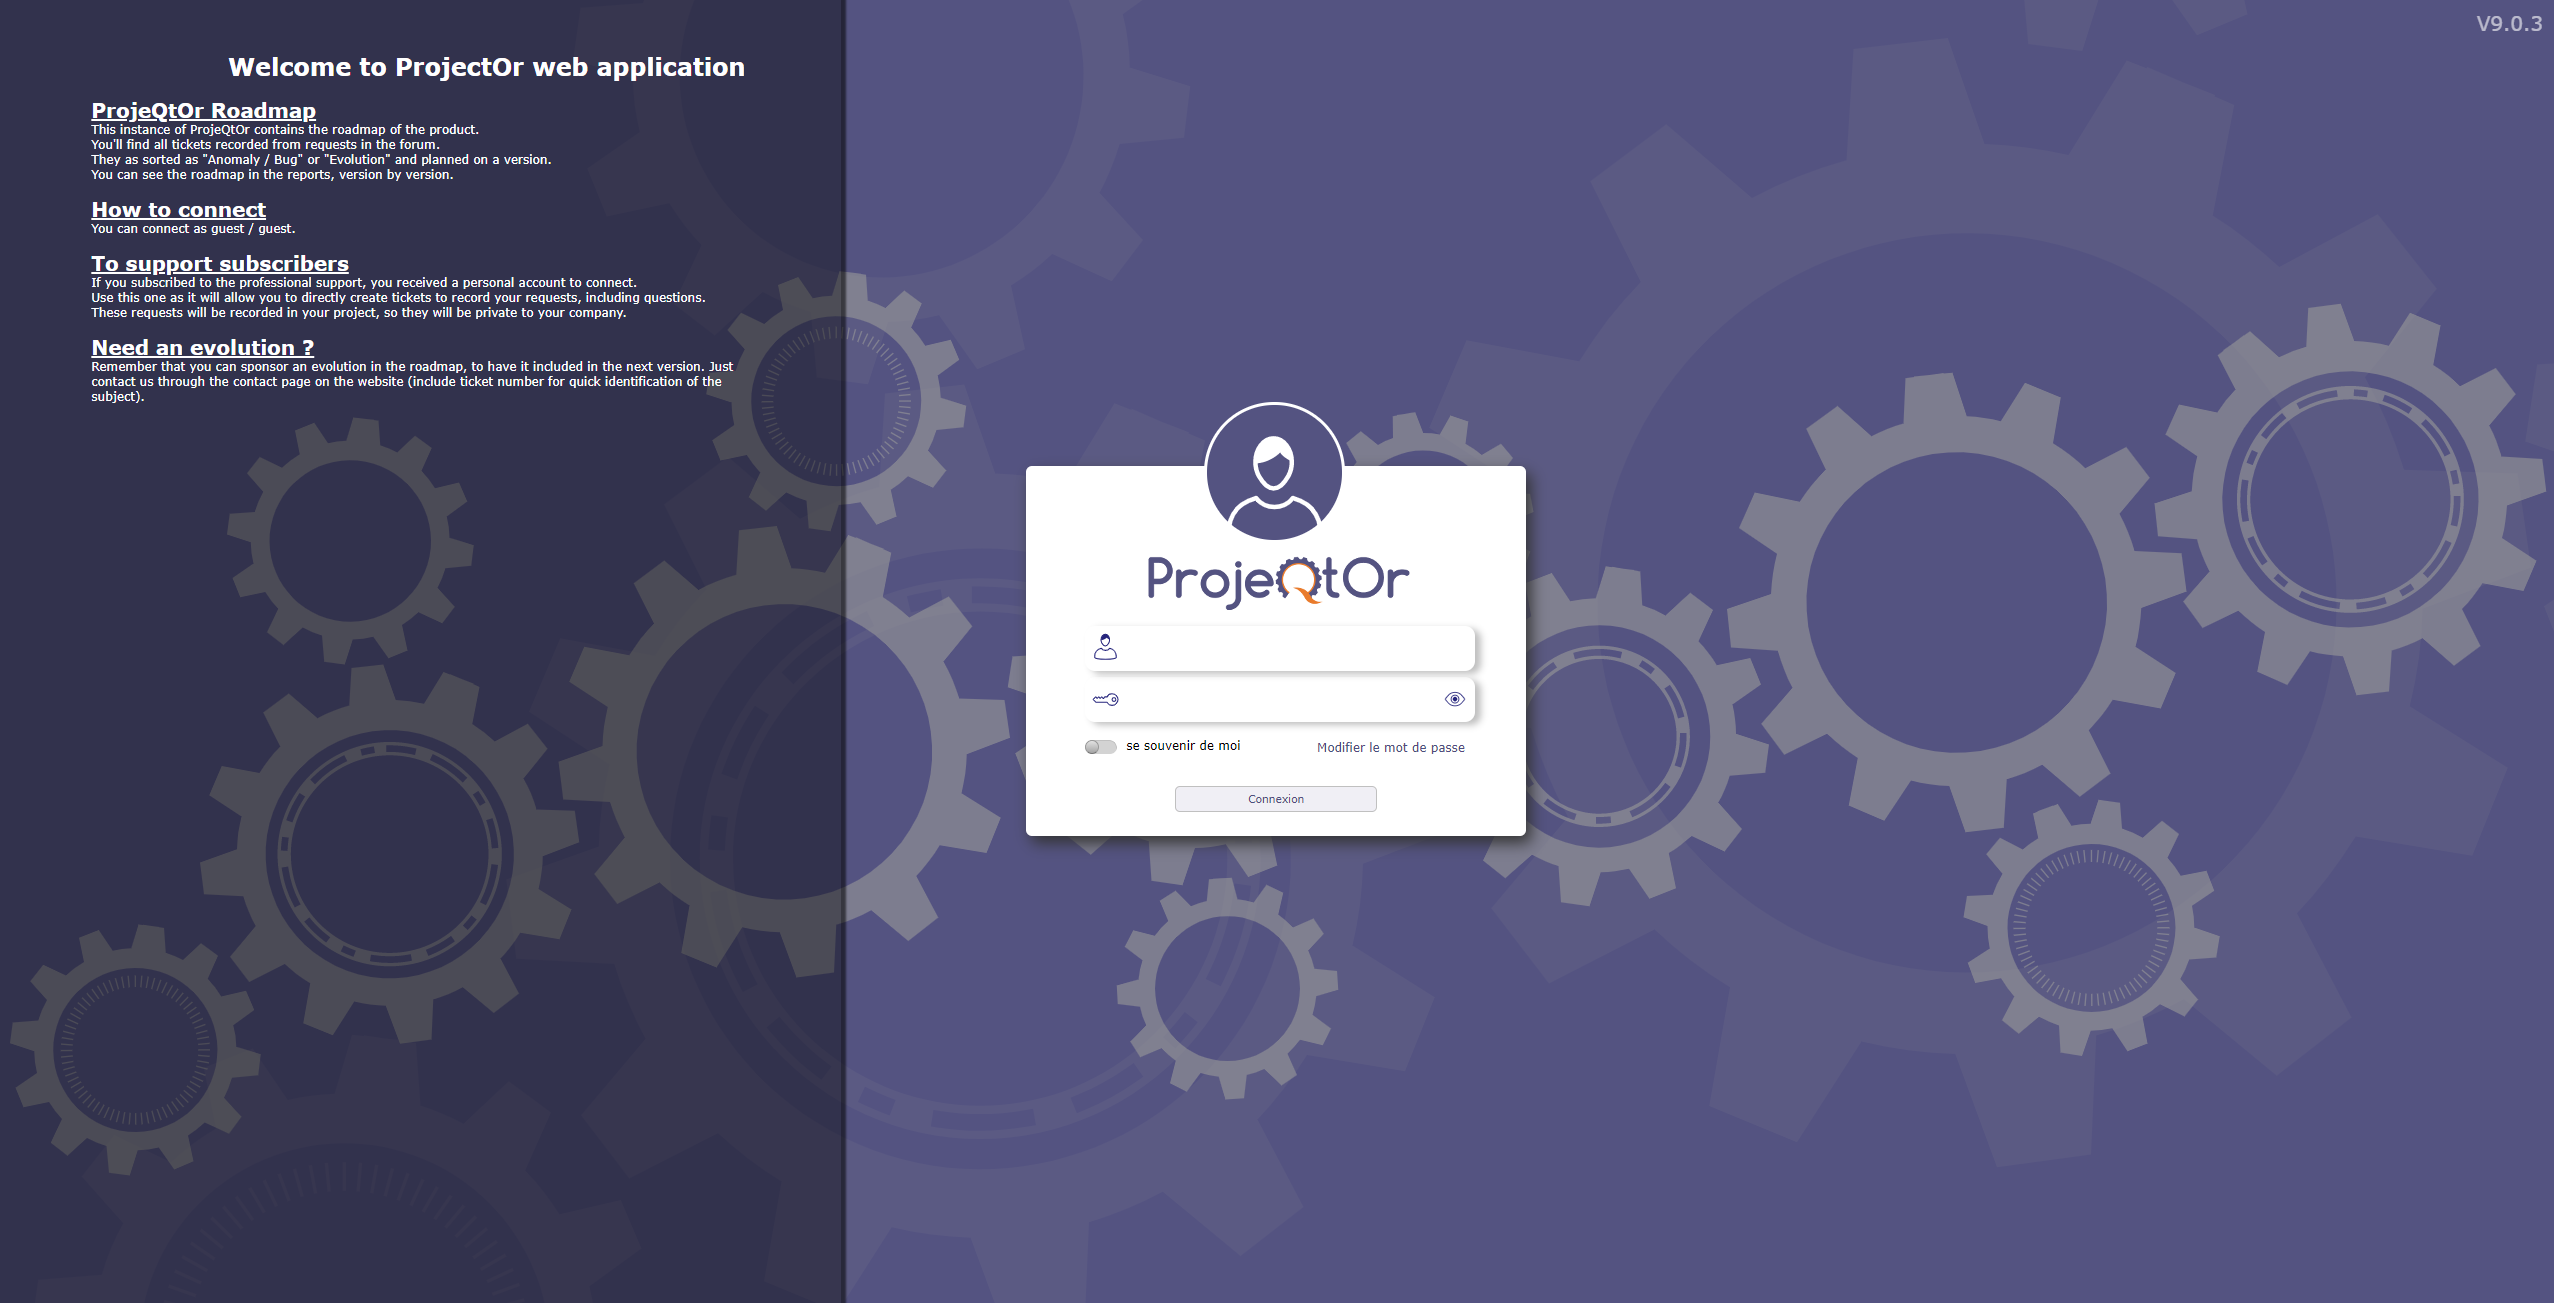
Login screen with message
Check the show on login screen box to see your message on the login screen.
Legal notice
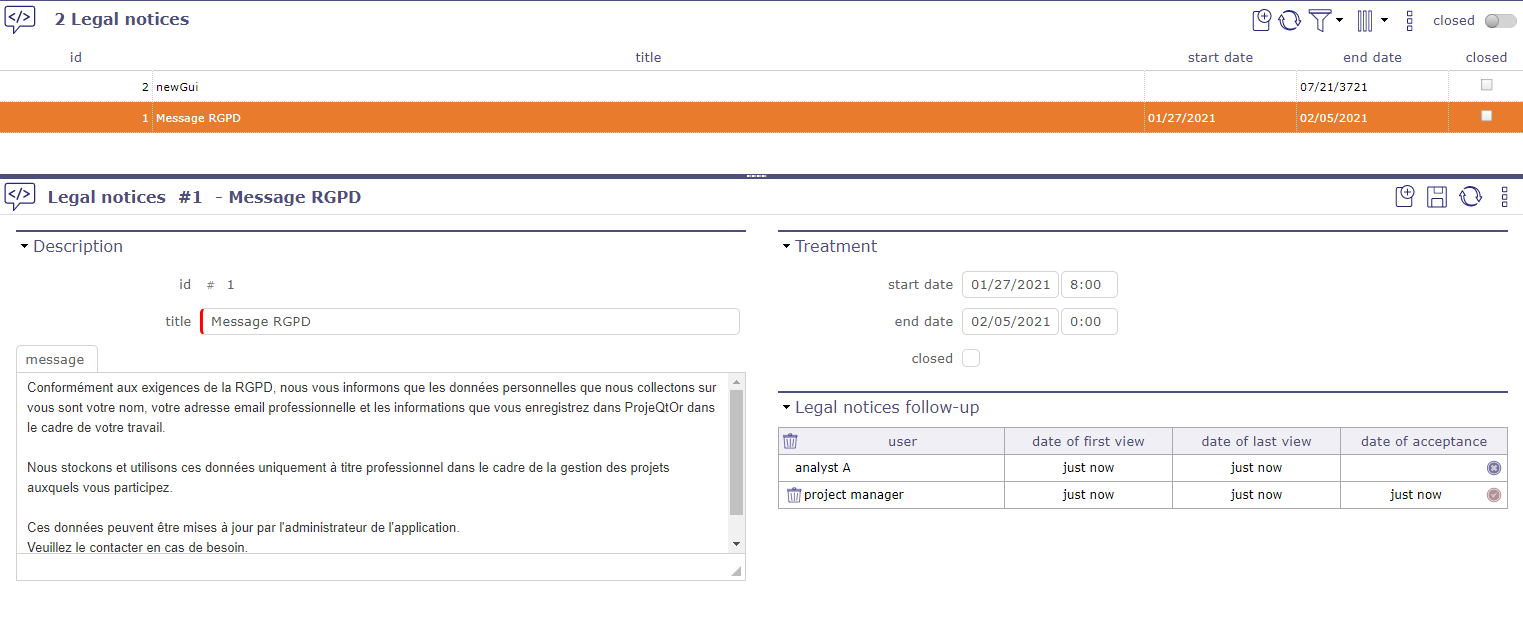
Legal notice screen
The General Data Protection Regulation (GDPR) governs the processing of personal data in the territory of the European Union.
Above all, this involves informing people about what you do with their data and respecting their rights. As a data controller, or as a processor, you must take measures to ensure that this data is used that respects the privacy of the persons concerned.
You can define a “legal” message that will be displayed when you log in from the home screen.
For this message to disappear, it must be scrolled to the read confirmation button.

Legal notice screen
This allows you to have a real-time follow-up of the users who have confirmed the reading of this message.
Note
What is the GDPR?
The abbreviation GDPR stands for “General Data Protection Regulation” (GDPR). The GDPR governs the processing of personal data in the territory of the European Union.
The legal context adapts to follow developments in technologies and in our societies (increased use of digital technology, development of online commerce, etc.).
This new European regulation is a continuation of the French Data Protection Act of 1978 and strengthens the control by citizens of the use that may be made of data concerning them.
It harmonizes the rules in Europe by offering a unique legal framework to professionals. It helps to develop their digital activities in the EU based on the trust of users.
Visit the CNIL web site here
Import data
Imports data from CSV or XLSX files.
Select the element type from the list.
Select file format (CSV or XLSX).
Select the file.
Click on Import data button to start importing.
Report of the import
Data that is not imported because not recognized as a field appear in grey text in the result table.
Data that are voluntarily not imported (because must be calculated) appear in blue text in the result table.
Import users
The password field must be cut and pasted from the database because it is encrypted.
If you enter some readable password, the users will not be able to connect.
Warning
If you want to create new users don’t put any id because if id already exists, it will be overridden by the new (with possibility to erase admin user…).
Always keep in mind that your import may have some impact on administrator user.
So be sure to keep an operational admin access.
Importing document versions
Two ways to import document versions, by describing only the version with its standard fields and by describing the document and the version (the name of the fields of the version will be followed by ‘(DocumentVersion)’, or its translation into the current language).
The CSV import file may also include the importFile field that will give the link to the version.
The target field that can be set to delete, the file to be imported is deleted after import or a directory name. The file to be imported is moved to this directory after import) or nothing (the file to be imported is not modified).
File format

Import file format
The content of the imported file must fit the element type description.
To know the data that may be imported, click on the  button.
Names of columns
The first line of the file must contain the name of the fields.
Names of columns can contain spaces (to have better readability).
The spaces will be removed to get the name of the column.
Tip
Look into the model class. The names are the same.
Date format
Dates are expected in format “YYYY-MM-DD”.
Data import process
The import process is performed according to the element type, column, and column value.
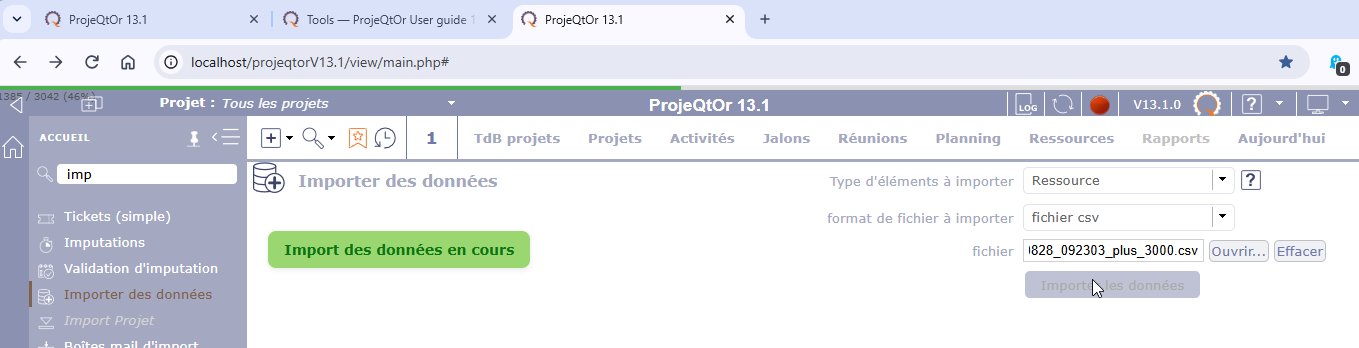
Import data Progress
Once started, the import process can take from a few minutes to several hours, depending on the volume of data to be imported.
A progress bar is displayed while the data is being imported. It disappears when the import is complete or when the request receives a completion signal.
The progress bar is displayed in the top bar of the browser window. You can leave the data import screen without interrupting the import process.
The result of the import is saved to a file. When you return to the import screen, the result of your last import is displayed.
If an import is still in progress, it will not be interrupted by other actions. However, you cannot start a new import until the current import is complete.
Column Id
You may add an “id” column to the import file.
If an ID is provided, the import attempts to update the corresponding element. The import fails if the specified element does not exist.
If no ID is provided, the import creates a new element from the imported data.
Linked tables
For columns corresponding to linked tables (“idXxxx”), you can use any of the following as the column name:
“idXxxx”
“Xxxx” (without “id”)
the column caption as displayed on the screens.
If the column value is numeric, it is considered to be the code of the item.
If the column value contains non-numeric characters, it is considered to be the name of the item, and the corresponding code is searched for using this name.
In all cases, columns with no value are not updated. This allows you to update only specific fields of an existing element.
To clear a field value, enter “NULL” (not case-sensitive).
Important
Do not import the “real work” value on tickets, even if it is specified in the import file.
Automatic import
Imports can be automated. Files placed on a defined directory will automatically be imported.
Automatic import parameters must be set in Global parameters.
Background task must be started by Administration Console.
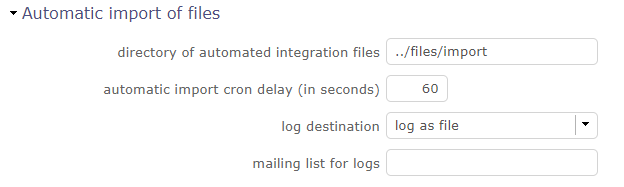
Automatic import files
The files must respect some basic rules.
File name format is: “Class”_”Timestamp”.”ext”: Example: Ticket_20241231_235959.csv)
Timestamp defined to be able to store several files in the directory.
Format is free. The recommended format is “YYYYMMDD_HHMMSS”.
File extension representing its format. Valid extensions are CSV and XLSX.
File format
The files must follow the ProjeQtOr File format and must be full and consistent.
Tip
The files should not be directly created in the import folder.
They must be created in a temporary folder and moved afterwards.
Import process
Correctly imported files are moved to a “done” sub folder of the import folder.
If an error occurs during import of a file, the full file is moved to “error” sub-folder of the import folder, even if there is only one error over many other items correctly integrated.
You can get the result as a log file and/or email summary.
Input mailbox for import
With automatic import mailboxes, you transfer a file to be imported via email.
Configure an import mailbox that will not insert an item but read the attached file (CSV or XLSX)
import it as if it had been placed in the automatic import directory.
Note
The attached file will be in the format “Class_XXXXXXXX.xlsx” or “Class_XXXXXXXX.csv”.
Class is the class of the items to be imported.
XXXXXXXX is a timestamp used to distinguish the files (typically YYYYMMDD).
Warning
Unlike automatic import, which is based on a directory, the timestamp will not be used to order the files to be imported; the order in which the emails are received will determine this order.
The sending email must be known and correspond to a user who has the right to create items of the class to be imported.
The import must be performed with the rights of this user.
This means that a project manager who imports activities will only be able to create activities on their own projects.
The results of the import will be returned by email to the sender’s address. The format will be identical to the manual import format.
Cloned Environnement
You can duplicate the complete environment (data and code) to form a simulation environment.
Important
The CRON program must be started and running so that the simulation request can be taken into account and can be generated.
The cloned Environment managment

Cloned environment managment
This screen allows you to manage your queries for new simulation environments, to follow them or to request the deletion of a particular simulation.
You can also track requests from other users based on your profiles and your rights.
Click on  to request the creation of a new simulation area, a pop up will appear allowing you to make your request.
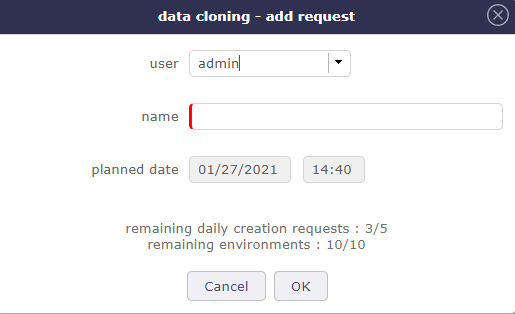
Add request
Identify the profile making the request, name your space and confirm your request by clicking on OK.
Note
The simulated databases will always have a name prefixed by simu_ followed by the name of the simulation.
Color code
Blue: Request being created
Orange: Warning (delete request)
Red: Error creating the environment (path, rights …)
Green: Environment creates
Go to the cloned Environment
When your simulation is ready, green status, you can open your cloned environment.
Click on  to launch the environment.
A new tab opens with a new ProjeQtOr session. Authenticate yourself, you can start working in your environment.

Cloned environment session
The instance area turns red when you are in a simulation space.
Not all screens or functions will be accessible in this space.
For example, you will not be able to request and create a new simulation space in your cloned environment.
Copy and delete a cloned Environment
You did a successful simulation on one of your cloned environment and you want the copy to run other tests but without touching the simulation.
Just copy this environment. The origin of the copy will then be indicated in the list with a shortcut to access it.
Deletion requests are stored in the simulation table. They are processed in the same process as creations, but always with priority to free up space before allocating new resources to new instances.
Tip
To avoid overly broad rights management and server invasion problems, all simulations (code) will be placed in a “simulation” directory outside of the main ProjeQtOr directory.
Thus, if the main instance is accessible via the url “projeqtor.xxx.fr”, the simulations will be accessible via the url: projeqtor.xxx.fr/simulation/nom_de_simulation.
Administration of simulation requests
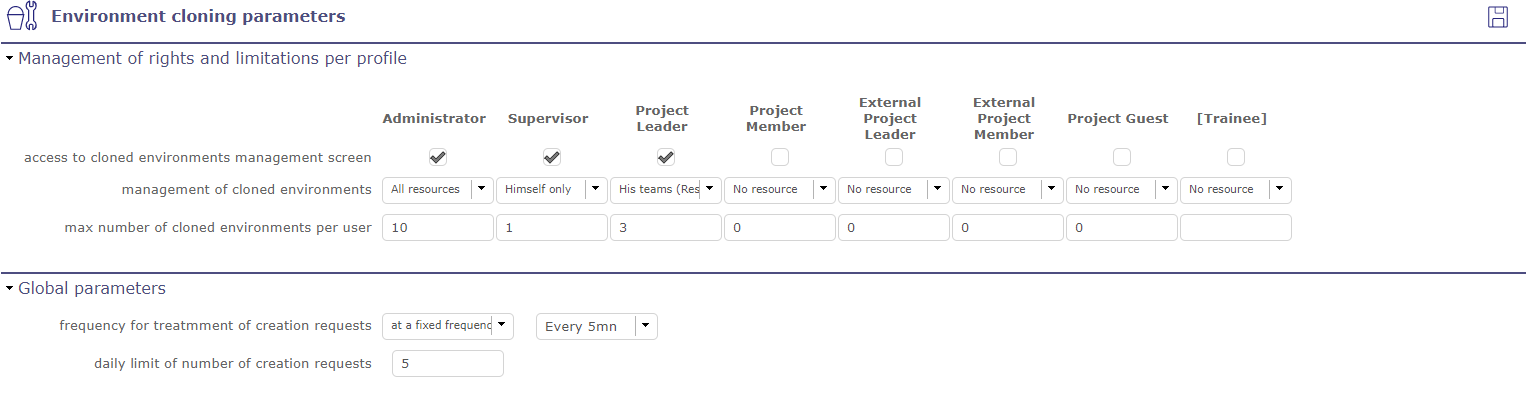
Cloned environment parameters
This parameters are also be accessible from simulated environments.
Click on  on the Simulation management screen. You can limit the number of total simulations per profiles.
This limitation can have some advantages:
Avoid saturating the server.
Force users to clean up their files.
Limit performance degradation caused by the creation of a simulated environment
The removal requests are decremented. If the limits are reached, the request screen to create a simulated environment is blocked.

Example of a invalid request due to too much creation request.
The time required to create a simulation space may vary. Depending on your database, your servers or even if several requests are generated simultaneously.
It is an operation which can take time. That is why you can set frequencies for creation requests.
Fixed frequency
Analyzes creation requests at regular intervals and starts the generation of simulation environment as soon as a request is encountered.
At a given time
In order to avoid any slowing down of the database, you can program the generations of the spaces at a specific time of the day. This allows these to be programmed outside working hours.
The creation of a simulation instance is a heavy process for the server: duplication of code, duplication of data. that’s why when generating your simulation space, not all data is copied. Lik archived data (closed), update history, attached documents and files, all automation email and notifications.
